Guides12 min read
How to Change the Colour of a Logo Without Ragged Edges
A PNG or JPG logo is one sheet of pixels, so a colour change catches the wrong pixels and leaves ragged edges. Rebuild it as vector shapes and every part becomes its own layer that takes a new hex code exactly. How to do it in seconds, and what we measured on 30 logos.
Key takeaways
- To change a logo’s colour cleanly, change shapes, not pixels. In a PNG or JPG every edge is a blend of two colours, so a pixel recolour either misses the edge or spills into similar colours. In a vector file each part is a shape with one fill, so a new hex code changes exactly that part.
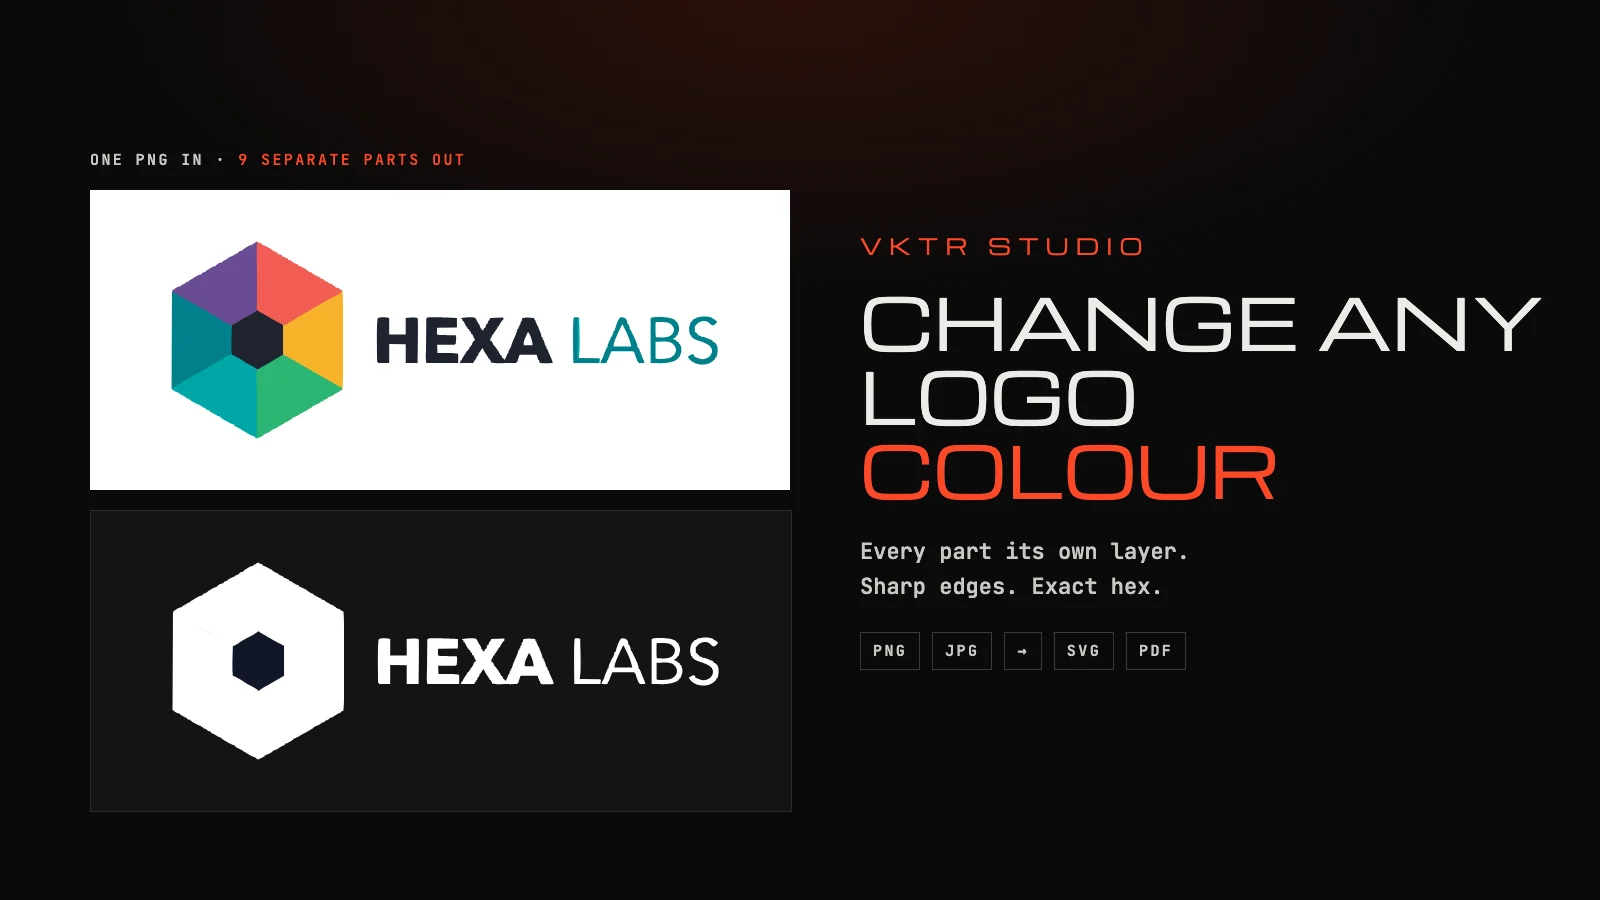
- If you only have a PNG or JPG, trace it into vector shapes first. VKTR Studio does this in the browser and splits the logo into layers, background, objects and text, with every colour selectable on its own.
- In our test of 30 logos, VKTR took a median of 1.5 seconds per logo, matched every flat colour to within 0.79 ΔE2000 (exactly, in 20 of the 30), returned 81% of the logo parts as separate shapes, and embedded no pixels.
- Change a colour by typing its hex code: one change updates every shape of that colour. Then download SVG, PDF, EPS or DXF at any size, after checking the lettering against the original.
The cleanest way to change the colour of a logo is to change it in a vector file, where every part of the logo is a separate shape with its own fill. Type a new hex code and that part changes, edges included, at any size. If you only have the logo as a PNG or JPG, convert it into vector shapes first. VKTR Studio does that in your browser in a second or two and splits the logo into layers you can recolour one by one.
This guide shows why recolouring the pixels goes wrong, how to do it properly from a PNG or JPG, how to do it in Illustrator, Inkscape or Figma when you already have a vector file, and what we measured when we ran 30 logos through VKTR.
Why recolouring a PNG or JPG logo leaves ragged edges
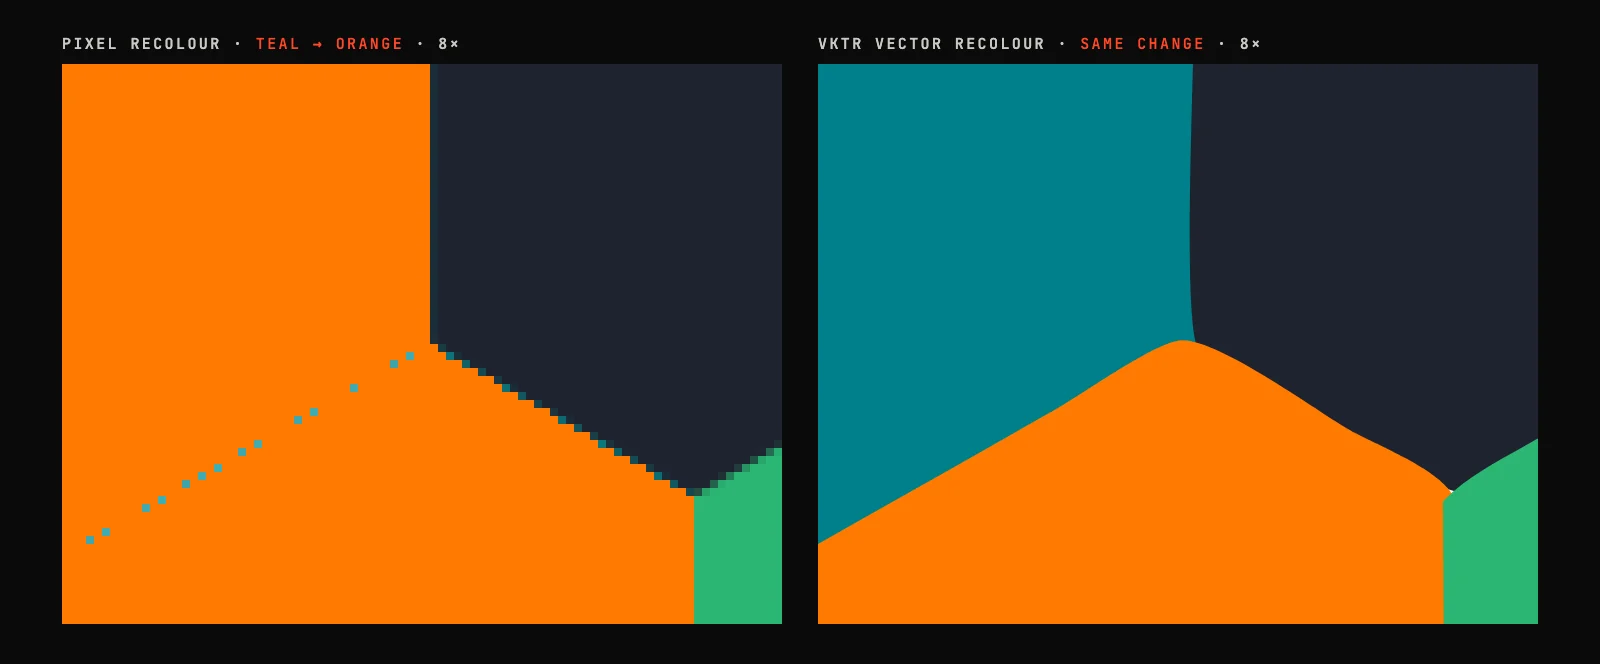
A PNG or JPG stores a logo as a grid of pixels. Along every edge, the pixels are blends of the colours on either side; that anti-aliasing is what makes the edge look smooth. A replace-colour tool has to decide which pixels count as the old colour. Set it tight and the blended edge pixels keep the old colour, leaving a fringe. Set it loose and it also catches other colours that are close, such as a darker shade next to the one you meant. A JPG adds compression noise on top, so even a flat area is not quite one colour.
Why a vector logo changes colour cleanly
In an SVG, PDF or EPS file, each shape is an outline made of Bézier curves plus a fill colour. Change the fill and the shape is simply drawn again in the new colour. There are no blended pixels to miss, because the edge is calculated from the curve at whatever size the logo is shown. Each part is its own shape, so you can change one part and leave the rest alone.
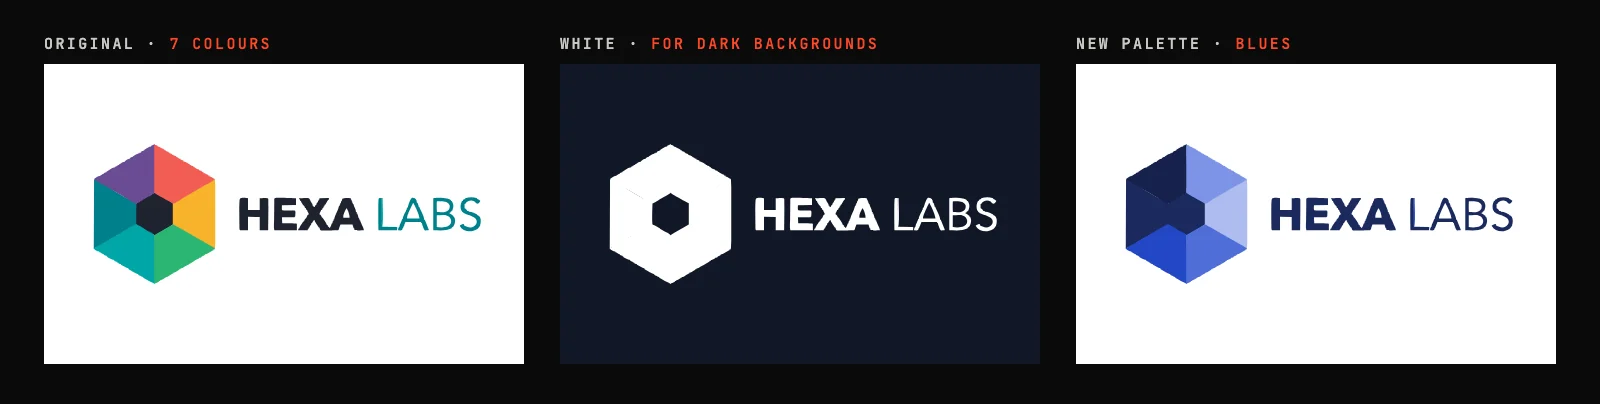
That is how one logo becomes a full set of versions: a white logo for dark backgrounds, a one-colour logo for engraving, embroidery or a rubber stamp, or a new palette for a campaign. Each version is the same file with different hex codes.
From one PNG to separate layers in about a second
Tracing turns the pixels into shapes: the software finds each area of flat colour, follows its edge and fits curves to it (how image tracing works explains the steps). VKTR Studio then groups the shapes by position and colour into the background, the objects and the text, in lines and then words, so you can select a whole word or a single piece.
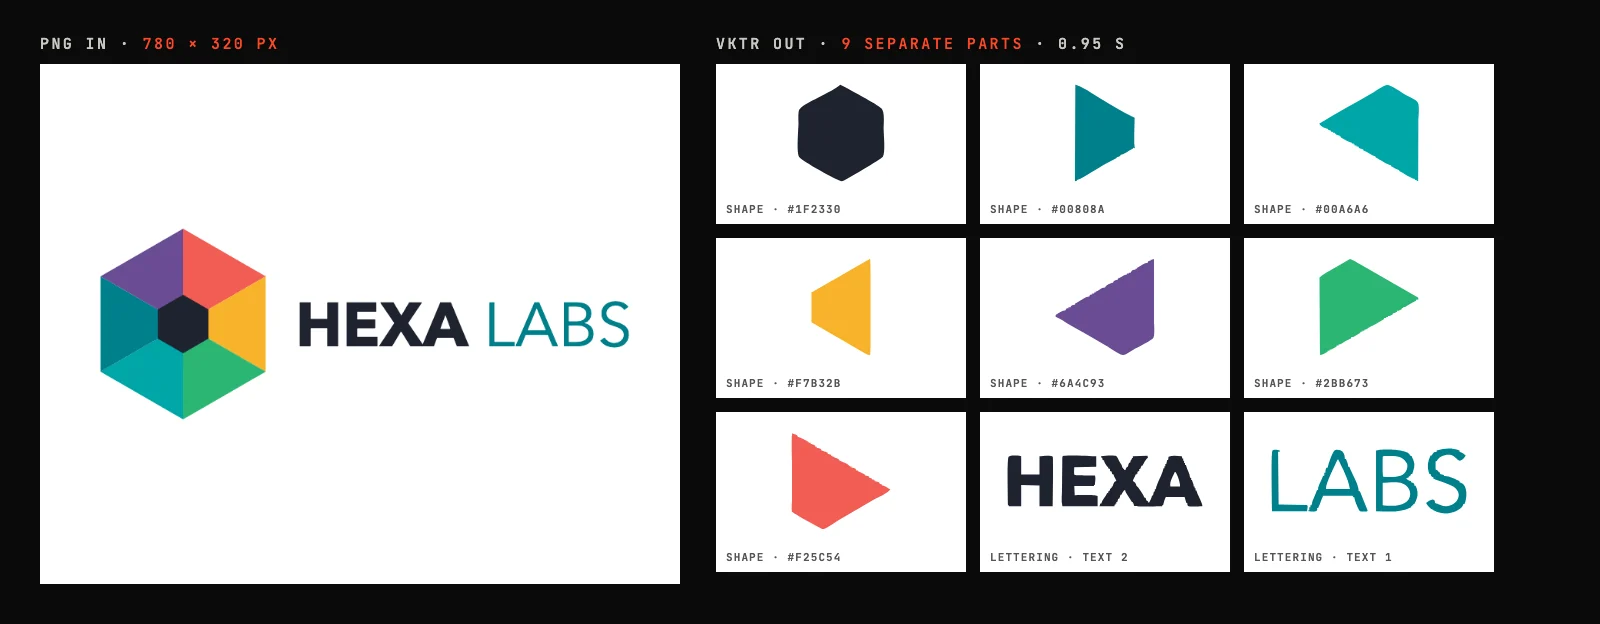
VKTR does not know what the objects are. It groups by position and colour, so a group is a sensible starting point, not a judgement about your design, and you can regroup anything.
How to change the colour of a PNG or JPG logo with VKTR Studio
1. Open the logo in VKTR Studio
Go to VKTR Studio and drop, choose or paste the logo: a PNG, JPG, WebP or HEIC image, up to 5 MB on the free plan. Use the largest, sharpest copy you have. The image is processed in your browser, not uploaded, and converting and editing need no account.
2. Check the trace before you edit
VKTR picks the logo’s flat colours, removes a plain white background and traces every area into smooth vector shapes, then shows the original and the result side by side. If two colours have merged, or an extra shade has appeared, change the number of Colours. Do this first: changing a setting traces the image again and discards your edits.
3. Pick the colour you want to change
In the Cleanup panel, Colours in the result lists every fill with its hex code and the number of shapes that use it. Click one to select every shape of that colour and open the colour picker. To change one part only, click it on the canvas and use Recolour, or click the colour dot beside one layer in the Layers panel.
4. Type the new hex code
Enter your brand colour’s hex code, pick a colour from the screen with the eyedropper, or choose one of the colours already in the image. The picker shows the colour before and after, and how many shapes the change applies to. To check a white version, switch the viewer’s background to Dark: it is only on screen and is not added to the file.
5. Download at the size you need
Set the width in millimetres, from 1 to 5,000, and download SVG, PDF, EPS or DXF. Each download uses one credit; a free account gets 2 a day, and Pro downloads without a limit.
For a logo with no source file at all, the logo to vector converter page covers lettering and file formats, and how to fix a pixelated logo for printing covers logos that are too small to trace well.
What we measured: 30 logos, traced and checked
We ran 30 made-up logos from VKTR’s test set through its tracing engine with the automatic settings: 10 one-colour logos, 10 multi-colour logos and 10 monograms. Each was drawn as an SVG and saved as a PNG 560 to 1,100 pixels wide, 13 on a transparent background, 13 on white and 4 on a coloured background. We ran the engine in Node.js on an Apple M1 computer, without the learned clean-up the Studio adds in browsers that support it, and compared every result with the original drawing.
| Logos | Median time | Colour match | Parts as separate shapes | Pixels embedded |
|---|---|---|---|---|
| 10 one-colour logos | 1.0 s | 9 exact; worst 0.20 ΔE | 37 of 53 (70%) | None |
| 10 multi-colour logos | 1.4 s | 8 exact; worst under 0.01 ΔE | 78 of 85 (92%) | None |
| 10 monograms | 2.0 s | 3 exact; worst 0.79 ΔE | 38 of 51 (75%) | None |
| All 30 | 1.5 s (0.4 to 7.7 s) | 20 exact; worst 0.79 ΔE | 153 of 189 (81%) | None |
- Time is the whole conversion, from opening the PNG to the finished vector file. In the Studio it depends on your device.
- Colour match is the CIEDE2000 difference (ΔE) between each flat colour in the original and in the result, for the logo’s worst-matched colour. Exact means 0. Every result was under 1, a difference too small to see side by side.
- Parts as separate shapes counts a part of the original drawing, such as a letter, a leaf or a piece of a hexagon, when one shape or group in VKTR’s file matches it with at least 80% overlap, so it can be selected and recoloured on its own.
- Pixels embedded checks that the file is pure vector shapes, with no image hidden inside it.
Where it fell short: parts of one colour that touch each other come back as one shape, because the tracer sees a single area of colour. A one-colour compass logo whose ten points meet in the middle had only 1 of its 10 parts separated, and that is most of the gap among the one-colour logos. Parts of one colour that do not touch can be split with Separate parts in the Cleanup panel. Monograms, with their fine serifs and thin rules, took longest and matched colours least exactly, though still well under 1 ΔE.
How to change a logo’s colour in Illustrator, Inkscape or Figma
If you already have the logo as a vector file, change the colours in the editor you use. These steps only work on vector shapes; a PNG placed in any of these apps is still pixels.
- Adobe Illustrator. Select the logo and choose Edit > Edit Colors > Recolor Artwork to change its whole palette at once. To change one colour only, select a shape that uses it, choose Select > Same > Fill Color, and set the new fill.
- Inkscape. Select the shapes and open Fill and Stroke (Ctrl+Shift+F). The RGBA field takes a hex code, the same kind of colour code a web page uses.
- Figma. Select the logo’s layers. When they use more than one colour, the right sidebar shows Selection colors, one entry per colour; click one to change it, or use its target icon to select every layer that uses it.
Making a white or one-colour version
Setting every colour to white (#FFFFFF) turns a multi-colour logo into a silhouette, and parts that were told apart only by colour merge into one white block. Keep the detail that makes the logo recognisable: give it the background colour, as the centre hexagon in the figure above, or a contrasting colour. Check the result on the background it will actually sit on.
For printing, ask which colours the printer needs. VKTR writes colours as RGB hex codes. If your printer works from Pantone or CMYK values, send them the numbers in your brand guidelines along with the file.
Which file formats keep the layers
| Format | What it keeps |
|---|---|
| SVG | Every shape, with the groups and layer names from the Studio |
| Every shape; the main elements (background, objects, text) appear as layers in Acrobat and other PDF readers | |
| EPS | Every part as its own path, but no groups or names: EPS has no standard way to store them |
| DXF | One layer per colour, with curves turned into short straight segments for cutters and lasers |
EPS vs SVG vs PDF explains which to send for print, the web or a cutter. Whatever you change, check the lettering against the original before you use the file: tracing can thicken thin serifs and small letters. And recolour only logos you own or have permission to use, because many brand guidelines set which colour versions are allowed.
Changing logo colours: questions
- How do I change the color of a logo?
- Change it in a vector version of the logo, where each part is a shape with its own fill: select the shapes of one colour and type a new hex code. If you only have a PNG or JPG, trace it into vector shapes first with a tool such as VKTR Studio, then recolour the shapes.
- How can I change the color of my logo for free?
- Open the PNG or JPG in VKTR Studio, which traces it into vector layers in your browser. Converting, recolouring and previewing are free with no account, and a free account downloads 2 files a day as SVG, PDF, EPS or DXF.
- Can I change the color of a PNG logo?
- Yes, but recolouring the pixels leaves a fringe of the old colour on the edges or spills into similar colours. Converting the PNG into vector shapes first gives every part one clean fill that changes exactly, with sharp edges at any size.
- How do I change my logo to white?
- In a vector version, set every fill to #FFFFFF. Parts that were told apart only by colour will merge, so give the detail that matters the background colour or a contrasting colour, and check the result on the dark background it is meant for.
- How do I change just one colour in a logo?
- Select every shape that uses that colour and change its fill. In VKTR Studio, click the colour in Colours in the result; in Illustrator, use Select > Same > Fill Color. Every other colour stays as it was.
- Why does my logo have jagged or coloured edges after changing the color?
- The edges of a PNG or JPG are made of blended pixels, part old colour and part background. A pixel recolour misses some of them, so a fringe of the old colour stays. A vector shape has no blended pixels: its edge is redrawn from the curve in the new colour.
- Does changing a logo's color reduce its quality?
- Not in a vector file: only the fill value changes, and the shape is redrawn sharp at any size. Recolouring a PNG or JPG can leave fringes, and saving a JPG again adds compression artefacts.
- Can I separate a logo into layers?
- Yes. VKTR Studio traces a PNG or JPG logo into vector shapes and groups them into the background, the objects and the text, with each colour selectable on its own. Parts of one colour that touch each other come out as one shape.
- How long does it take to vectorize a logo?
- With VKTR Studio, usually a second or two. In our test of 30 logos the median was 1.5 seconds, from 0.4 to 7.7 seconds, on an Apple M1 computer. Fine monograms took longest.
- Which file format keeps a logo's layers?
- SVG keeps every shape with its groups and names. PDF keeps every shape and lists the main elements as layers in Acrobat. EPS keeps every part as a separate path without names, and DXF puts each colour on its own layer.
References
- Adobe: Recolor options overview (Illustrator)
- Adobe: Select objects with same fill and stroke (Illustrator)
- Inkscape: Keyboard and mouse reference
- Inkscape Beginners’ Guide: Custom Colors
- Figma: View and adjust colors in a mixed selection
- W3C: SVG 1.1 (Second Edition), Painting: Filling, Stroking and Marker Symbols
- ISO 32000-1:2008 (PDF 1.7), 8.11 Optional Content (Adobe-hosted copy)
- Sharma, Wu and Dalal: The CIEDE2000 color-difference formula, Color Research & Application 30(1), 2005