Guides7 min read
Spot UV File Setup: How to Make the Mask for Gloss and Raised UV Printing
Gloss, raised and textured effects are printed from a mask: a layer that says where the varnish goes. How to build it so the press puts it in the right place.
Key takeaways
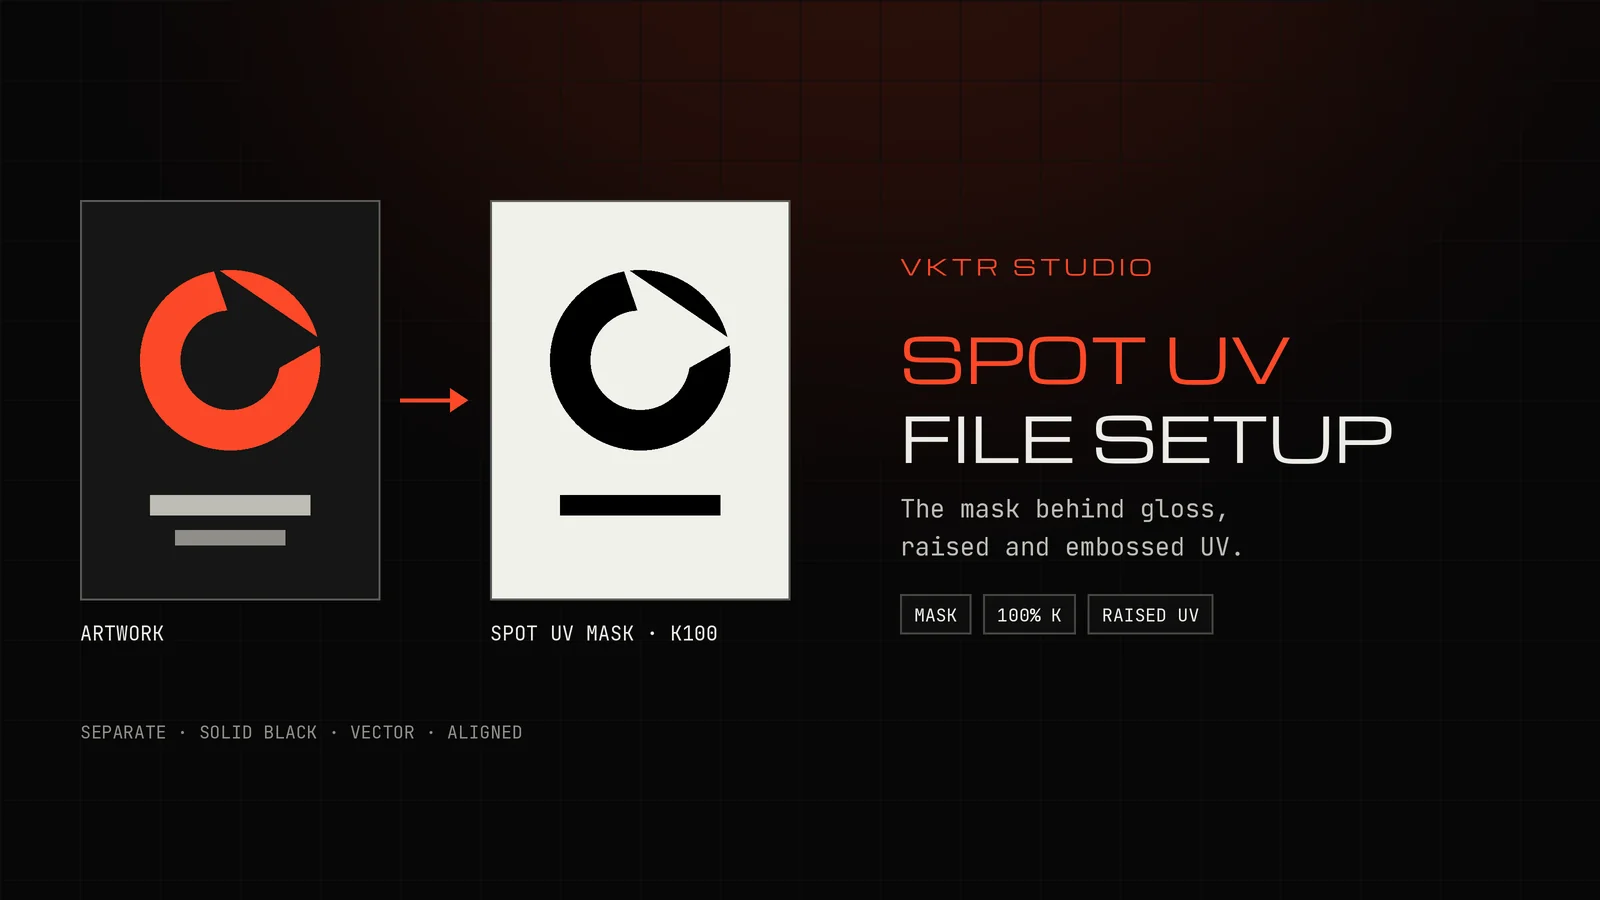
- A spot UV or raised UV effect is printed from a mask: a separate layer or file that marks where the varnish or raised ink goes, usually in solid 100% black (K100).
- Printers that publish setup guides ask for a vector mask with no gradients, shadows or greys, exactly aligned with the artwork.
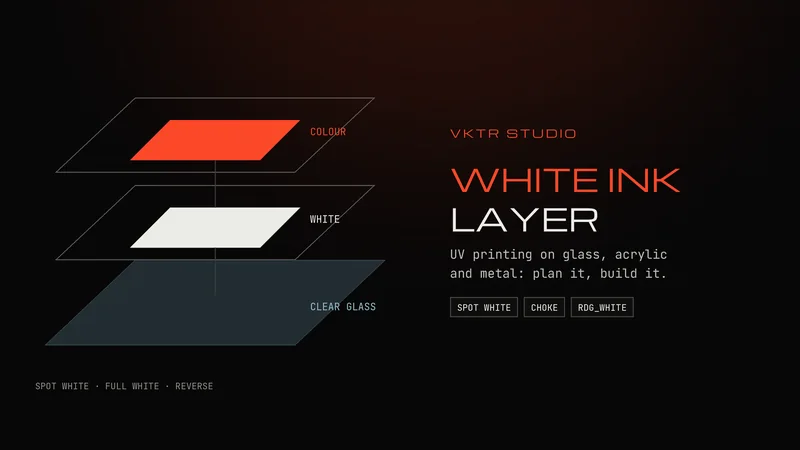
- On a UV flatbed press, gloss and raised layers are spot channels in the printer’s software, set up like a white ink layer. Height is usually built in white ink, then coloured and varnished.
- If the logo is only a PNG or JPG, trace it to vector shapes first. VKTR Studio groups the shapes by colour, so the parts that take varnish can be selected together.
To set up a spot UV file, put the parts that should be glossy or raised on their own layer, or in a separate file of the same size, fill them with solid 100% black, and keep them exactly aligned with the artwork. Anything that should stay flat is left empty. The printer turns that mask into the varnish or raised layer.
The same idea works for spot gloss on offset-printed business cards, raised spot UV on packaging, and the gloss, matt and raised layers of a UV flatbed or bottle press. Only the naming and the delivery change, so this guide covers the shared rules first and the differences after.
What spot UV and raised UV mean
Spot UV is a clear, glossy varnish printed only on selected areas, such as a logo on a matt business card, so those areas catch the light. It is cured with ultraviolet light, which is where the name comes from. Raised spot UV, also sold as embossed UV or 3D UV, builds the coating thicker so it can be felt as well as seen.
On a UV flatbed press the same effects come from extra ink channels. Sun Studio, a UV printing studio in Dubai in the same group as VKTR, explains in its guide to raised printing that a raised element is a channel in the artwork, usually built in white ink, which the press prints more times than the rest. Colour prints over it, and clear varnish can go over the whole face or only chosen areas. The same guide gives about 6 mm of relief as the practical limit, beyond which the studio treats a job as fabrication rather than print.
The mask: rules printers agree on
Printers that publish spot UV setup guides give almost the same rules. 4OVER4 asks for a separate mask file made as vector art in a vector program, using only solid 100% K, with no shadows, glows or greyscale images, and white meaning no UV. Jukebox Print uses black for treated areas and white for untreated ones, and asks for the black to be exactly 100% K.
- Separate. The mask is its own layer, or its own file or page, never mixed into the colour artwork.
- Solid black. Coated areas are 100% K (C0 M0 Y0 K100). No tints, greys or gradients: the press either coats an area or it does not.
- Vector. Clean outlines give the varnish clean edges. A blurry mask gives a blurry coat.
- Aligned. Same page size, same position, so the varnish lands exactly on the artwork.
- Named. Call the layer or file Spot UV, Varnish or Raised, or whatever your printer asks for.
Raised spot UV uses the same setup. 4OVER4 states that raised spot UV jobs are set up the same way as spot UV jobs; the printer controls the height.
Setting it up for a UV flatbed press
A UV flatbed press does not need a separate varnish plate, but its RIP still has to know which areas get gloss or height. Most RIPs read that from named spot colours on their own layers, exactly like a white ink layer. In Roland’s VersaWorks, gloss is the spot colour RDG_Gloss and white is RDG_WHITE. Mimaki’s RasterLink can instead replace a chosen call-out colour with clear ink. Ask your printer which names and layer order they use.
Raised work usually involves three layers: white for height, colour on top, then varnish. If you are building the file yourself, put each on its own layer and say which elements should be felt and which should only be seen. Sun Studio asks for exactly that: the raised elements on their own named layer, and a note of what is relief, spot gloss, spot matt or flat. On clear or dark surfaces, a raised element also needs a white underlay first.
How to make a spot UV mask from a logo
1. Get the artwork as vector shapes
Open the vector master of the design. If you only have a PNG or JPG, trace it in VKTR Studio. The result is grouped by colour, and Select every shape of this colour picks, for example, all the gold lettering at once, so you can see which shapes will take varnish. Download an SVG or PDF.
2. Duplicate the artwork onto a new layer
In Illustrator, Inkscape or Affinity Designer, copy the artwork onto a new layer named Spot UV, or the name your printer uses. Lock the colour layer so nothing moves.
3. Delete everything that stays flat
On the Spot UV layer, keep only the shapes that should be glossy or raised. Everything else stays empty.
4. Fill the shapes with solid black
Fill the remaining shapes with 100% K (C0 M0 Y0 K100), or with the spot colour your UV press uses for gloss. Remove strokes, or expand them into fills, and convert any text to outlines.
5. Check the small details
Thin lines and tiny text are hard to varnish cleanly. Sun Studio’s guide to raised printing puts it simply: hairline detail is the wrong thing to build up. Thicken or leave out anything too fine, then compare the mask with the artwork at 100% zoom.
6. Export and name the files
Save the colour artwork and the mask as matching pages or files, for example card-front.pdf and card-front-UV.pdf, or as one PDF with named layers if your printer accepts that. Use the same page size for both.
Common mistakes
- A grey or gradient mask. The press treats coverage as on or off, so a soft fade becomes a hard edge or disappears.
- A mask made from a screenshot. Pixel edges become jagged varnish edges. Trace or redraw the shapes first.
- Live text on the mask. If the printer does not have your font, the text shifts or changes. Convert text to outlines; how to vectorize text explains how.
- Masks that do not line up. A mask exported at a different size or crop lands in the wrong place.
- Gloss on everything. Spot UV works by contrast. A matt background with glossy details reads better than gloss everywhere.
When a raster mask is the right choice
Masks are normally vector, because the edges matter. The exception is a texture: a varnish that follows the grain of photographed wood or stone, or the brush strokes of a painting. Those come from a greyscale image, in which the amount of varnish varies across the surface.
Mimaki’s RasterLink manual draws the same line. A special plate generated in the RIP prints at a single density, so varying the density, as with gradations, needs separate image data. Not every press or finish can do graded varnish, so ask before you send one.
Spot UV on bottles, glass and gifts
The same mask principle applies to objects. On a bottle printed on a cylindrical press, gloss or matt varnish can go over selected areas, which Sun Studio lists on its bottle printing page. The mask is then part of the flat wrap artwork: see artwork for bottle and tumbler printing.
For the whole process around this, from preflight checks to proofs, see what prepress is. Sun Studio’s guide to raised and 3D embossed UV printing explains how the layers build up on the press, including braille.
Spot UV files: questions and answers
- What colour should a spot UV mask be?
- Solid black, 100% K (C0 M0 Y0 K100), on a separate layer or file, unless your printer asks for a named spot colour. Areas without varnish stay empty or white.
- Can I make a spot UV file in Photoshop?
- You can, but edges are cleaner from vector shapes, and some printers require a vector mask. 4OVER4, for example, asks for the mask to be made in a vector program such as Illustrator.
- What is the difference between spot UV and raised spot UV?
- Spot UV is a thin glossy coat you mainly see. Raised spot UV is built thicker so you can also feel it. The file setup is the same; the printer controls the height.
- How small can spot UV detail be?
- It depends on the press and the finish. Very fine lines and small text are hard to coat cleanly and should not be built up. Ask your printer for their minimum line width and text size.
- Do I need a separate file for spot UV?
- Most printers want either a separate file or page of the same size, or a separate named layer in the same file. Check which your printer prefers before you export.
References
- 4OVER4 Help: How do I set up a Spot UV job?
- 4OVER4 Help: How do I set up a Raised Spot UV job?
- Jukebox Print: How to prepare print-ready files for specialty finishes
- Roland DG VersaWorks 7: Printing using white ink, gloss ink and primer
- Mimaki RasterLink7 reference guide: Special plate
- Mimaki USA: Specialty paper packaging how-to (PDF)
- Sun Studio: Raised and 3D embossed UV printing