Guides10 min read
How to Make an SVG for Cricut From Any Image, Layered by Colour
Cricut Design Space cuts an SVG layer by layer, one colour per mat. How to turn a PNG or JPG into a clean, layered SVG, what Design Space refuses to upload, and what we found when we checked 26 traced logos against Cricut’s own rules.
Key takeaways
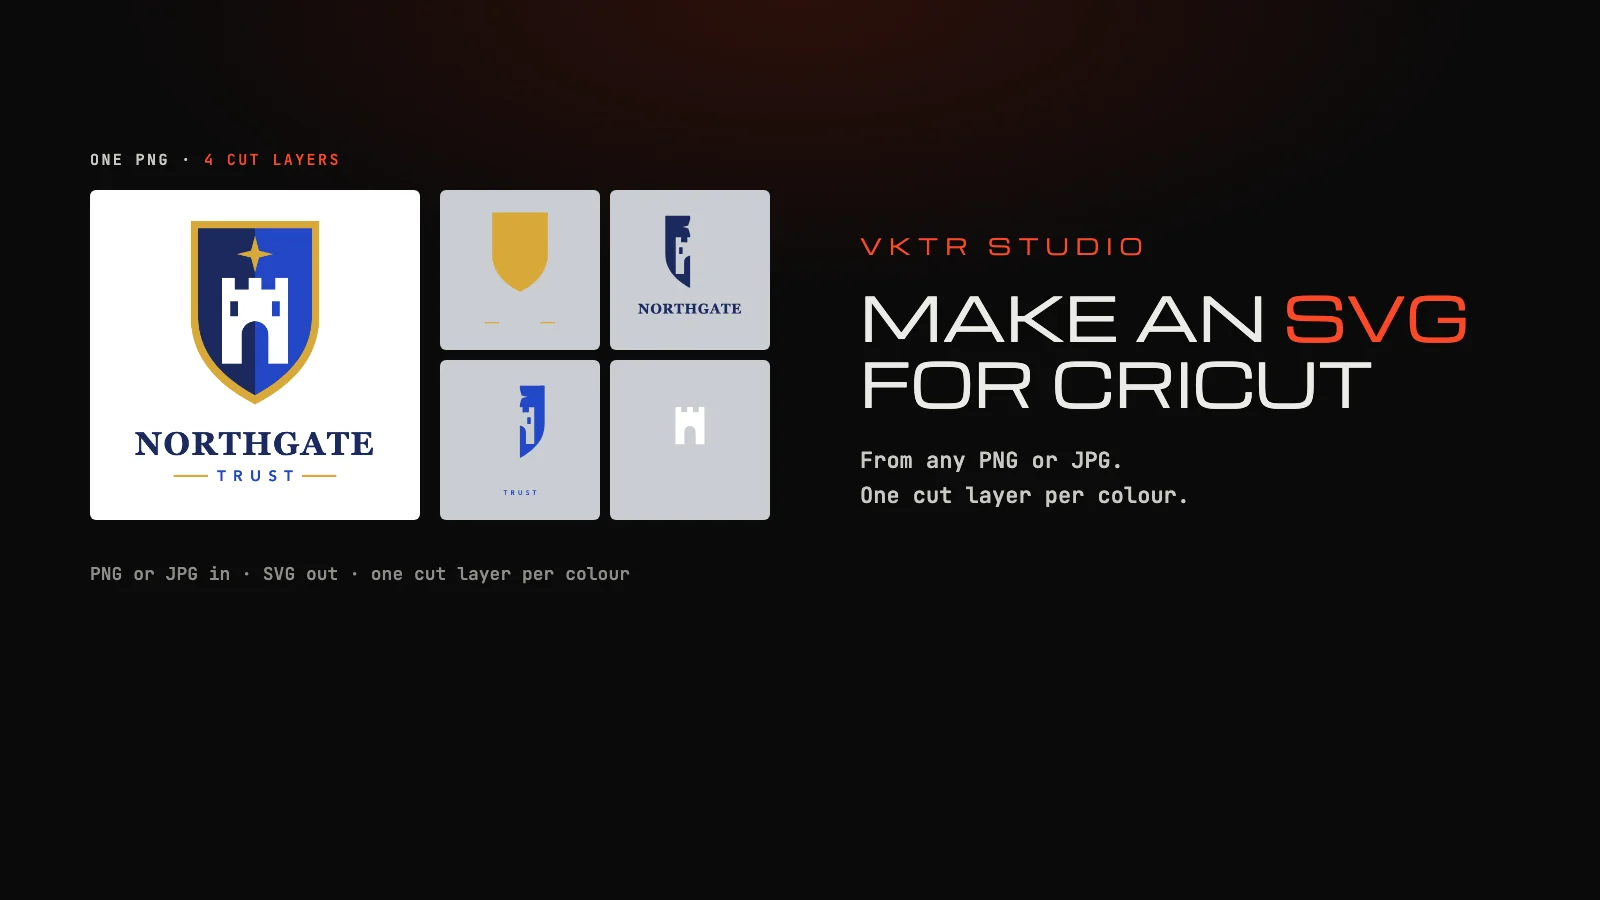
- To make an SVG for Cricut, turn your image into vector shapes with one flat colour each and save it as SVG. Design Space uploads an SVG as a cut-ready vector image and separates it into layers by colour, so each colour cuts on its own mat.
- A PNG or JPG uploads as a single layer. Design Space can split a multi-colour image into layers with Convert to Layers, but Cricut lists that feature as exclusive to Cricut Access subscribers; a layered SVG made beforehand arrives with its layers.
- Design Space rejects SVGs with gradient or pattern fills, clipping paths, editable text or images inside, and SVGs with more than 5,000 paths. We traced 26 test logos with VKTR Studio: none contained any of those, the largest had 135 paths, and the colour layers matched the design in 25 of 26.
- Check every layer before you cut. Half the logos had pieces under 1 mm² at 100 mm wide, from fine details or from slivers where two colours are close, and small pieces are the hardest to cut and weed.
To make an SVG for Cricut, convert your image into vector shapes with one flat colour each and save it as an SVG file. Cricut Design Space treats an SVG as a vector image: it uploads cut-ready and, as Cricut’s help puts it, files designed with layers are separated into layers automatically, by colour. VKTR Studio makes that SVG from a PNG or JPG in your browser in a second or two.
This guide covers why an SVG beats a PNG for cutting, what Design Space will not accept, how to make the file step by step, and what we found when we checked 26 traced logos against Cricut’s rules.
Why Cricut wants an SVG, not a PNG
Design Space has two kinds of upload. A PNG, JPG, GIF, BMP or HEIC file is a basic image: it uploads as a single layer, and you mark the cut line yourself by erasing the background. An SVG or DXF is a vector image: its shapes are already outlines, so the machine cuts along them exactly, and a design with several colours arrives as several layers.
Design Space can turn a multi-colour PNG into layers itself, with Convert to Layers, up to 9 of them. Cricut lists that feature, and its Automatic Background Remover, as exclusive to Cricut Access subscribers. A layered SVG made before you upload brings its layers with it. Use SVG rather than DXF if you design on a phone or tablet: Cricut notes that DXF uploads are not supported in Design Space for iOS and Android.
What Cricut Design Space will not upload
Cricut’s help lists what an SVG must not contain; a file that breaks the rules gets the message “Your file includes unsupported items”, or “File Too Large” for too many paths:
- Gradient, pattern or texture fills. Every shape needs one flat colour, because Design Space separates the layers by colour.
- Clipping paths. Shapes must be real outlines, not one shape hiding part of another.
- Editable text. Letters must be converted to shapes first.
- Linked or embedded images. A photo inside an SVG cannot be cut.
- More than 5,000 paths. Cricut restricts SVG uploads to 5,000 paths.
A traced file meets most of these by its nature: tracing produces outlines with flat fills and turns letters into shapes. Two things to watch in VKTR Studio. A smooth colour ramp can be kept as a gradient, and Make flat in the Cleanup panel turns it into one colour. The Editable text tool replaces traced letters with live text, so leave it alone on a file meant for Cricut, or use Restore outlines to undo it.
How to make a layered SVG for Cricut with VKTR Studio
1. Open your image in VKTR Studio
Go to VKTR Studio and drop, choose or paste a PNG, JPG, WebP or HEIC image, up to 5 MB on the free plan. Use the largest, sharpest copy you have. The image is processed in your browser, not uploaded, and converting and editing need no account. Use only images you own or are allowed to use; Cricut asks the same of uploads.
2. Check the colours
VKTR picks the image’s flat colours, removes a plain white background and shows the original and the result side by side. Every colour listed under Colours in the result becomes one layer, and one mat, in Design Space. If two colours you want as one have stayed apart, open Advanced settings and lower Colours; do this before you edit, because a new setting traces the image again and discards your edits.
3. Look at every layer
Click a colour under Colours in the result to select every shape of that colour, and look for slivers: thin pieces of one colour along the edge of another, which appear when two colours in the image are close. Delete them, or recolour them to the colour they sit on. Leave the lettering as traced shapes: the Editable text tool swaps them for live text, which Design Space cannot upload.
4. Download the SVG
Set the width in millimetres, from 1 to 5,000, and download SVG. Each download uses one credit; a free account gets 2 a day, and Pro downloads without a limit.
5. Upload it to Cricut Design Space
In Design Space, select Upload, then Upload Image, and choose the SVG. It goes through the vector upload: select Continue, name it, and select Upload. It lands on the Canvas as a grouped image; ungroup it to move or resize the layers separately, and check the size before you cut.
Stacked or sliced layers
Cricut describes two ways to build a layered design. Stacked has a solid base layer with the other layers on top, which Cricut recommends for iron-on, paper and vinyl. Sliced has pieces that fit together like a puzzle without overlapping, which Cricut recommends for Infusible Ink.
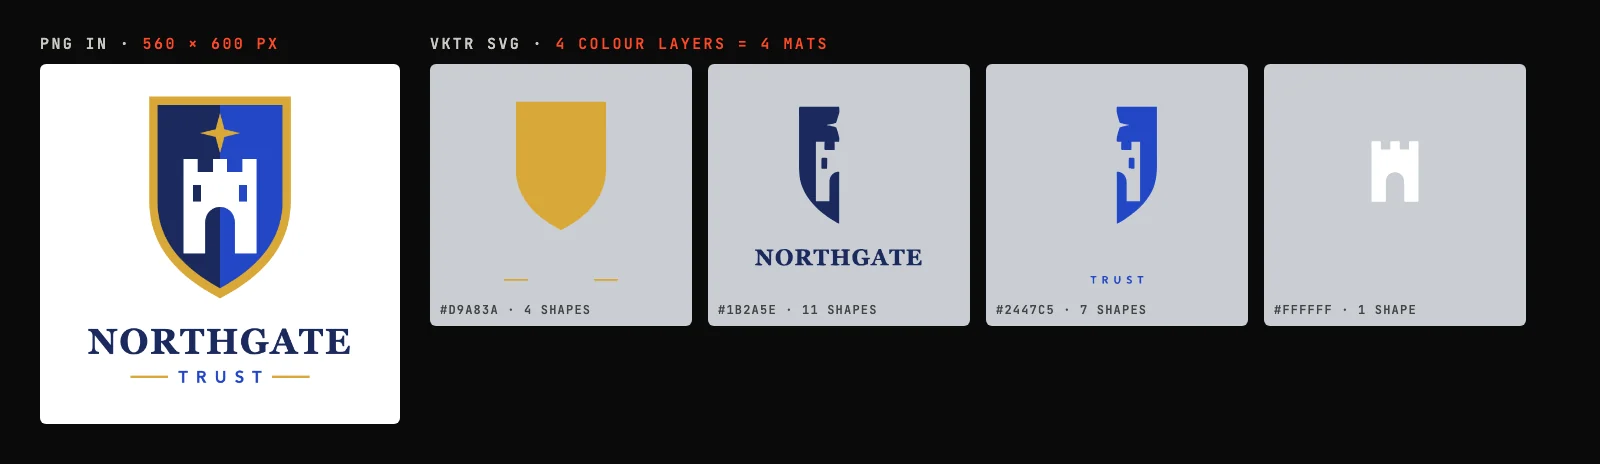
VKTR’s traces build each layer the way the design does. Where one shape lies on another, the lower shape stays whole underneath; where colours meet side by side, they overlap very slightly along the edge they share. If you want a base layer under everything, for iron-on on a dark shirt for example, Cricut suggests the Offset tool on the Canvas.
What we found: 26 logos checked against Cricut’s rules
We took the 26 made-up logos in VKTR’s test set that sit on white or on nothing: 10 one-colour logos, 8 multi-colour logos and 8 monograms. We saved each on white as a PNG 560 to 1,100 pixels wide, traced it with VKTR’s engine and its automatic settings, run in Node.js on an Apple M1 computer, and checked each SVG against the rules in Cricut’s help pages. Piece sizes are measured with each logo set 100 mm (about 4 inches) wide.
| Check | What we found |
|---|---|
| No more than 5,000 paths | 2 to 135 paths per file (median 22.5) |
| No gradient, pattern or image fills | None in any file |
| No clipping paths | None in any file |
| No editable text | None in any file |
| No linked or embedded images | None in any file |
| One layer per colour | Matched the design’s own colours, not counting the white page, in 25 of 26 |
| Pieces under 1 mm² at 100 mm wide (not a Cricut rule) | In 13 of 26 logos |
| Time to trace (not a Cricut rule) | Median 1.4 seconds, longest 6.4 seconds |
The one colour miss was a white letter A inside a blue circle, which VKTR cleared as if it were the hole in a letter. Unticking Clear enclosed background areas under Advanced settings keeps it.
The small pieces come from two places. Some are real details, such as the dots of a dotted frame or small lettering. Others are slivers: when an image has two close colours, the soft edge of one can be read as the other.
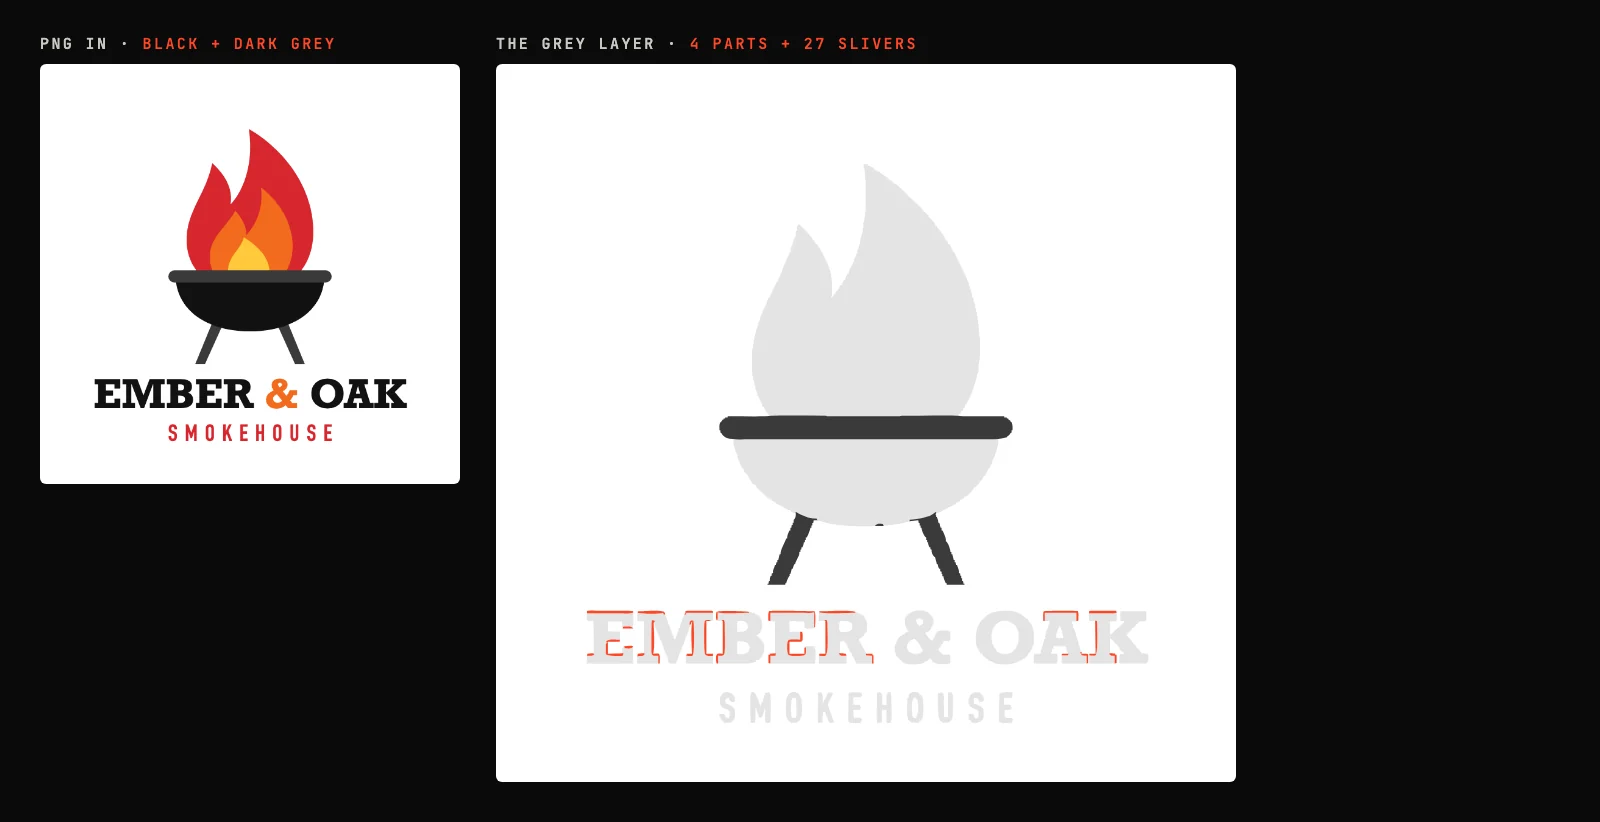
Size matters as well. A piece’s area grows with the square of the width, so cutting a logo twice as wide gives every piece four times the area. If a design is full of tiny parts, cut it bigger or simplify it before you cut.
Free ways to make an SVG for Cricut
- Design Space on its own. Free for a one-colour cut: upload a PNG or JPG as a Single Layer and erase the background. Multi-colour layers from an image need Convert to Layers, a Cricut Access feature.
- Inkscape. Free desktop software with a Trace Bitmap command; how image tracing works explains what it does.
- VKTR Studio. In the browser, layered by colour, free to convert and edit without an account; a free account downloads 2 files a day.
For a PNG, the PNG to SVG converter covers transparent backgrounds; how to make a logo transparent explains why a white box or white letter holes would otherwise be cut too.
Cricut SVG questions
- How do I make an SVG file for Cricut?
- Turn your image into vector shapes with one flat colour each and save it as SVG, for example with VKTR Studio, which traces a PNG or JPG in the browser. Then upload it in Cricut Design Space with Upload > Upload Image; each colour becomes its own layer.
- Can I convert an image to an SVG file for Cricut?
- Yes. Trace the PNG or JPG into vector shapes and download the result as SVG. Use the largest, sharpest copy of the image, check every colour layer for slivers, and keep the lettering as shapes rather than editable text.
- Can I create my own SVG for Cricut for free?
- Yes. Design Space cuts a one-colour PNG for free as a single layer, Inkscape traces images for free, and VKTR Studio converts and edits for free in the browser, with 2 SVG downloads a day on a free account.
- Why won't my SVG upload to Cricut Design Space?
- Cricut rejects SVGs that contain gradient or pattern fills, clipping paths, editable text, or linked or embedded images, and SVGs with more than 5,000 paths. Flatten gradients, convert text to shapes, and simplify the file, then upload it again.
- How do I get separate colour layers in Cricut Design Space?
- Upload an SVG whose shapes have flat colours: Design Space separates it into layers by colour. For a PNG or JPG, Design Space’s own Convert to Layers does it, but Cricut lists that feature as exclusive to Cricut Access subscribers.
- Should I use SVG or DXF for Cricut?
- SVG. Both upload as vector images on a computer, but Cricut notes that DXF files are not supported in Design Space for iOS and Android.
- Can I upload a JPG to Cricut instead of an SVG?
- Yes, as a basic image. It uploads as a single layer after you erase the background, or as a Flat Graphic, a full-colour image for Print Then Cut with a home printer. For several cut colours from one image, an SVG is the way.
- Does text in an SVG need to be converted for Cricut?
- Yes. Design Space cannot upload editable text in an SVG, so letters must be shapes. Traced lettering already is; in VKTR Studio, do not use the Editable text tool on a file meant for Cricut.
- Why does my Cricut cut tiny pieces I did not design?
- Usually they are slivers: when two colours in the image are close, the soft edge of one can be traced as the other. Check each colour layer before you cut, delete the slivers, or remove them in Design Space with the Contour tool.
- How do I make a layered SVG for iron-on vinyl?
- Use a stacked build, with a solid base layer and the other colours on top, which Cricut recommends for iron-on, paper and vinyl. A traced SVG keeps lower shapes whole where others lie on them; for a base under everything, use Design Space’s Offset tool.